

Enlarging an image for a hand-painted poster, part 2
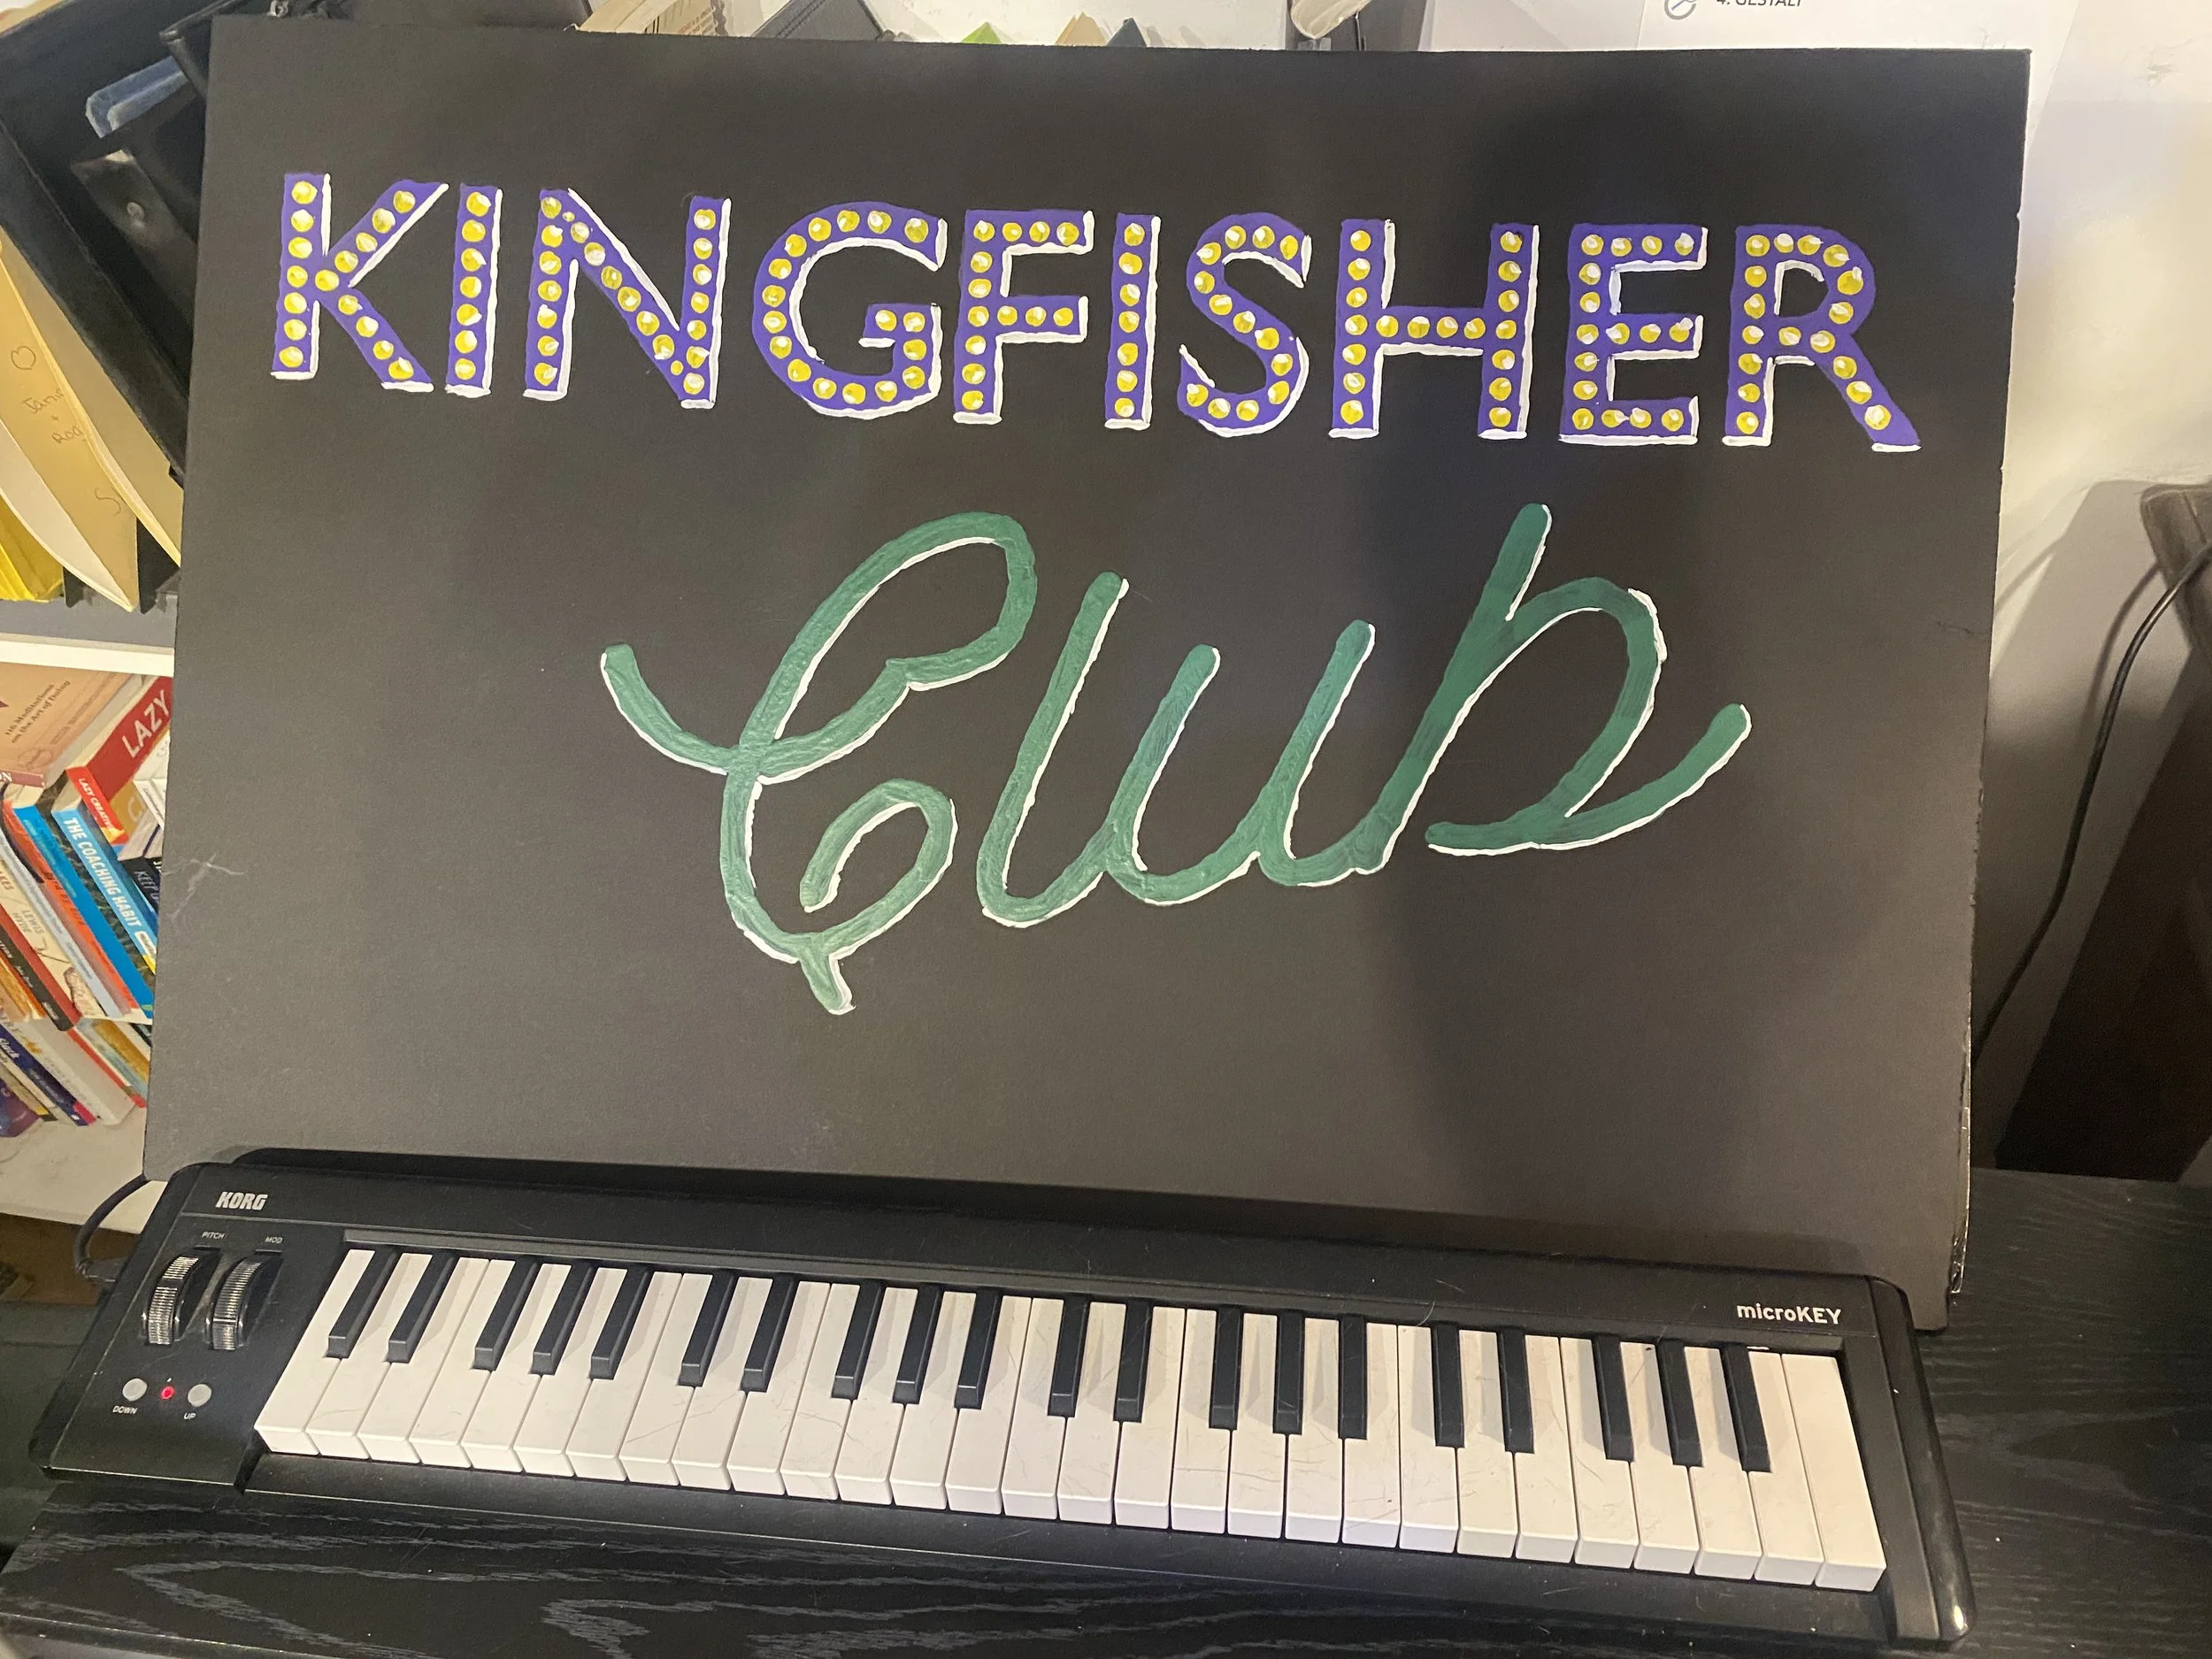
/And now, the thrilling conclusion in our two-part series of how to enlarge an image by hand for a poster, just like your caveman ancestors had to do! My example is a neon sign for Miss Ella’s nightclub, the Kingfisher Club, but yours might be something more along these lines:

So we used some sleight-of-hand to get our graphics program (in my case, Pixelmator Pro) to split up a poster-sized image onto letter-size paper so that we could print those images and then splice them back together into the full-size image.
Like so:
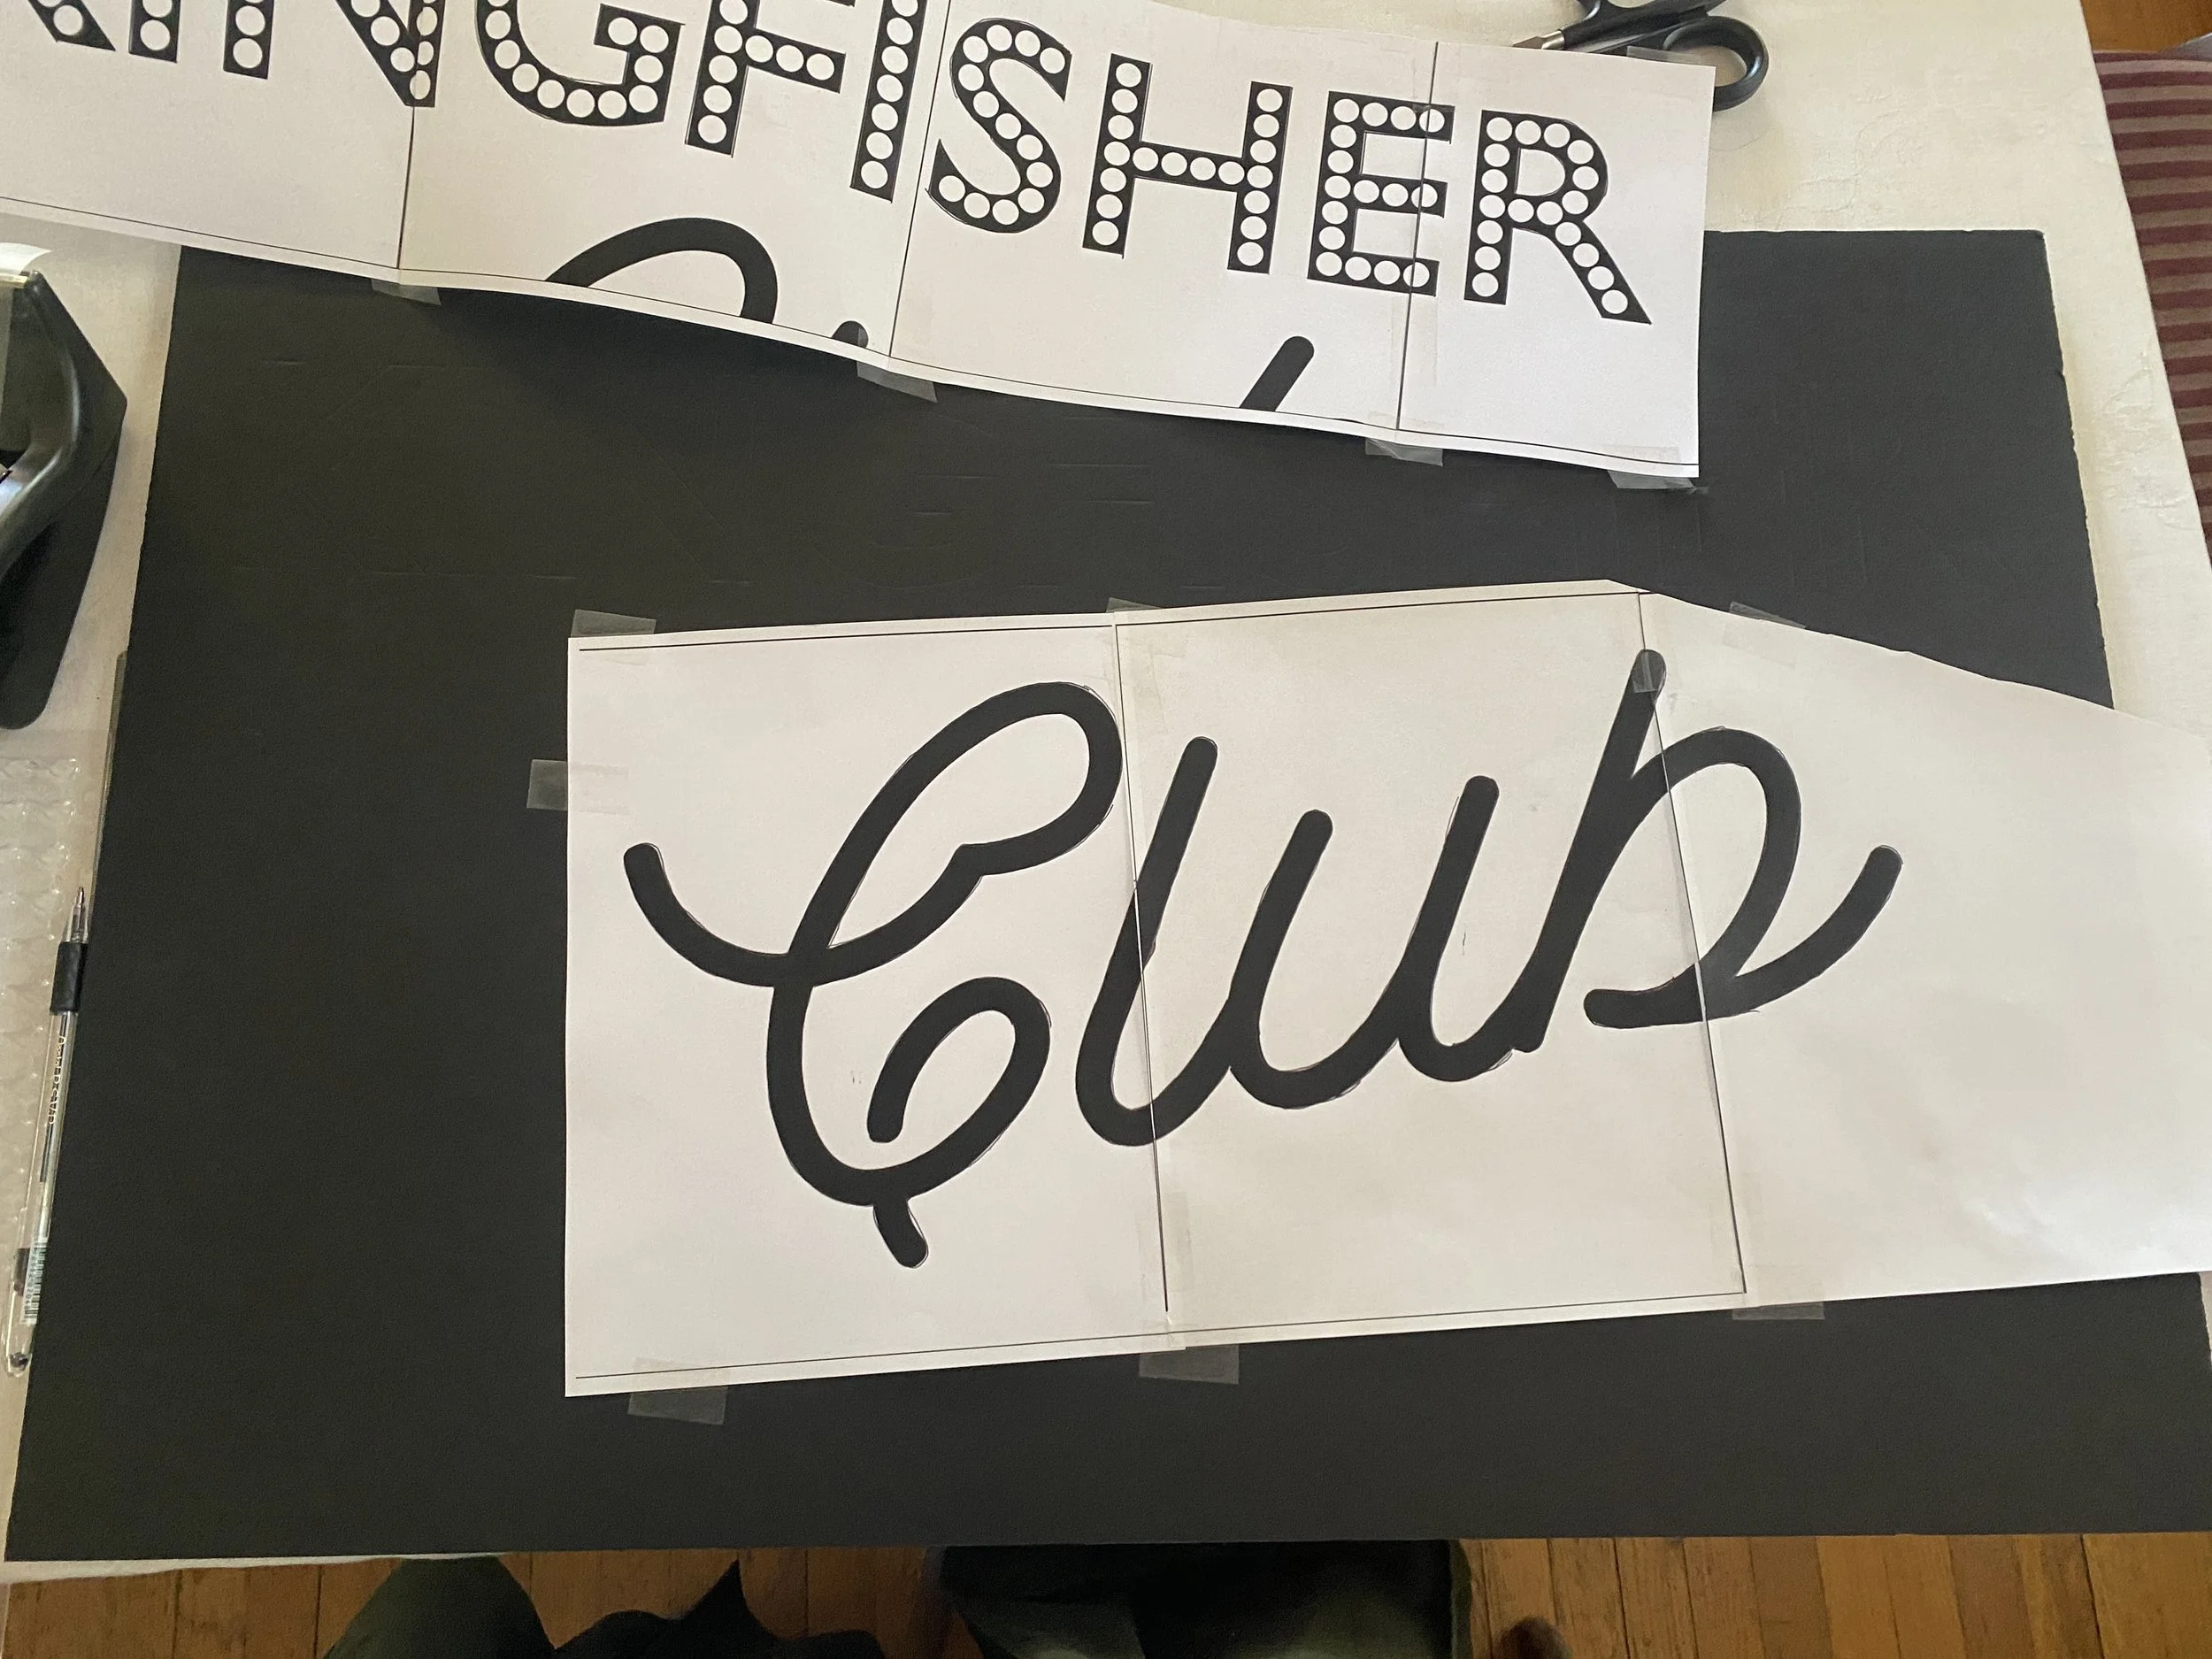
Lightly tape your printed image onto your foam board. (If you’re using poster board, you might want to put a piece of cardboard under it.)
Use a ballpoint pen to trace your image firmly.
The results:

Sidebar: Did I trace all those little circles in the KINGFISHER part of the sign? I did not.
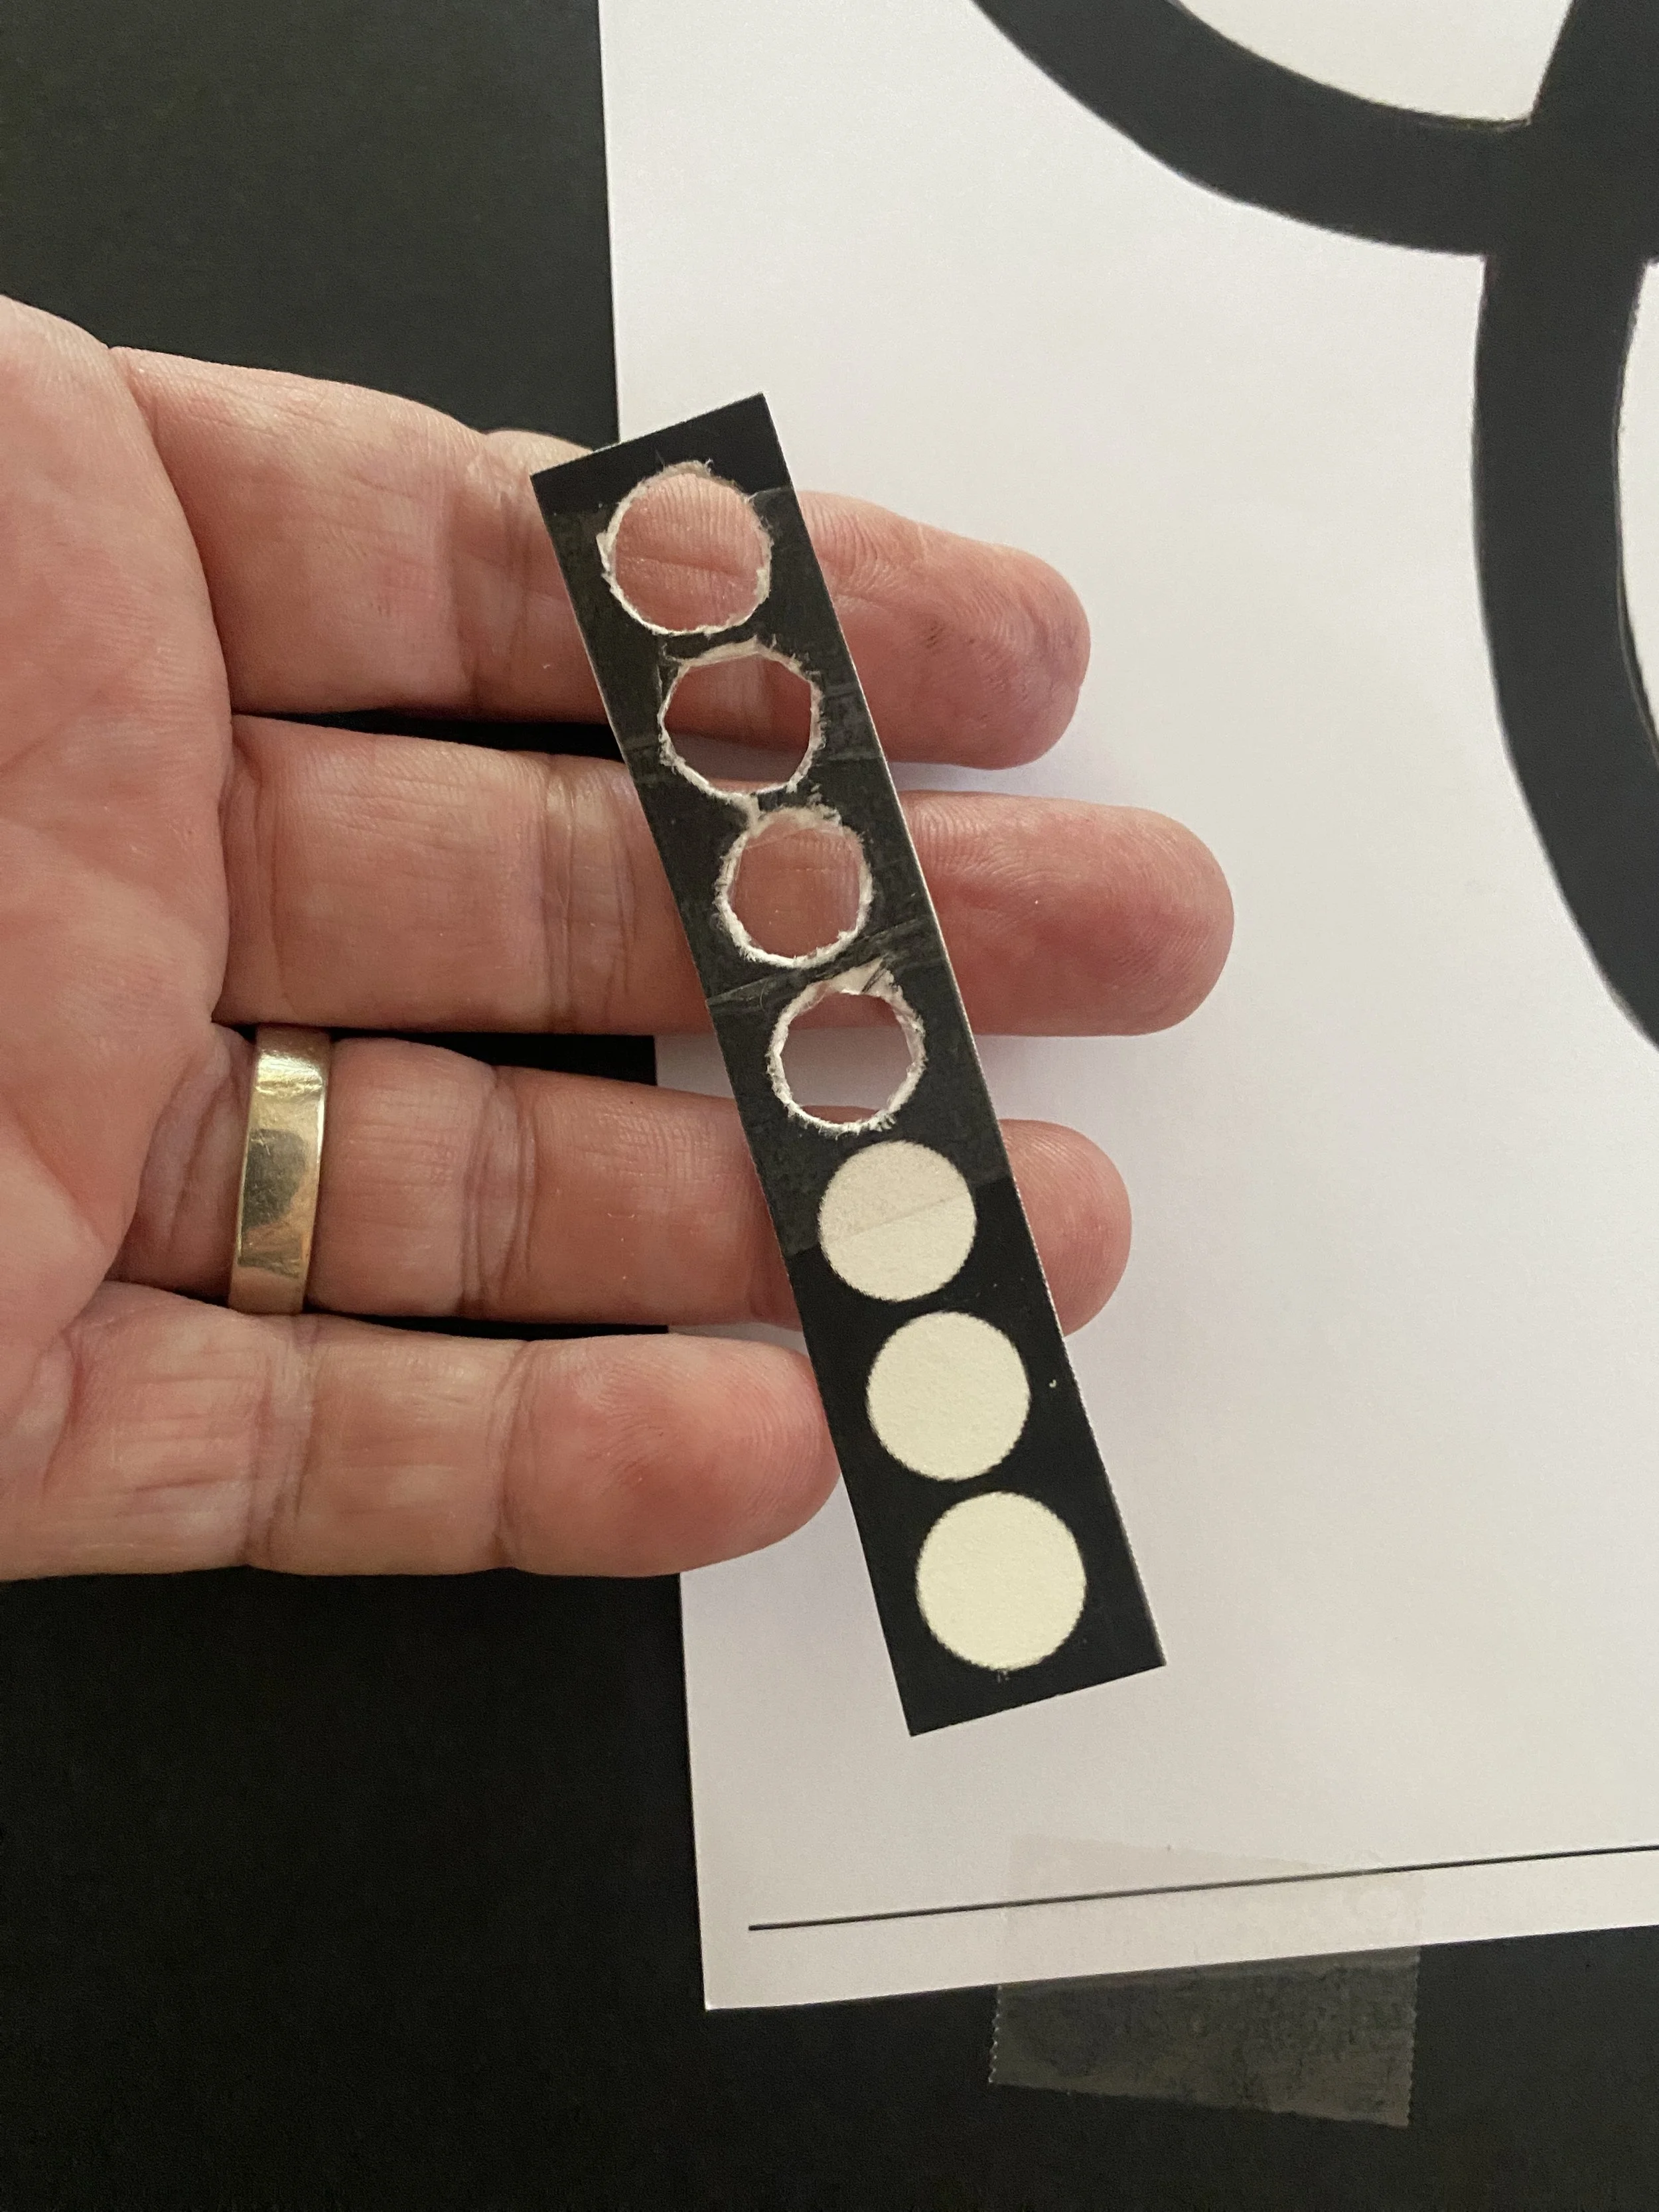
I made a little template out of the “I” in the sign and cut out half of them. Notice that the cutting was not perfect, nor were my pencil tracings — this sign will be seen for 30 seconds at a distance of 20 feet or so. Perfection is not our goal here. As we used to say in the costume shop at UGA, they’ll never see it past the second row.
So after tracing the images, it’s just a matter of filling in your outlines with paint. I have no photos of the process, but how much simpler could this be?
The irony is that after I spent last week getting this sign ready for the Really Matters Theater on Friday night, I arrived at Southern Arc Dance to find that we were blindsided by some scheduling issues: high school graduation and a musical down at the theatre claimed our entire roster of performers and audience members. After making sure there were no hordes of disappointed audience members, we decided to fade away into the night and save our performances for next month. You haven’t missed Miss Ella!
